Kallitype
The printing process called Kallitype was developed by W.W.J. Nicol between 1889 and 1891.
At the beginning it was used with 3 variations, known as I, II and III. The recipe is similar to the Van Dyke, the base is ferric oxalate (instead of ferric ammonium citrate as in the Van Dyke) and silver nitrate as sensitizing agent. Exposure to UV light can produce an image on paper. Another difference from the Van Dyke print, that you would develop in water, is that the kallitype requires a specific developing agent.
Many variations on the Kallitype process were edited since Nicol’s times/years.
For the procedure to have success, everything must be kept perfectly clean.
Kallitype is easily contaminated by small amounts of metals or other chemicals, so containers, trays, brushes etc., must be perfectly clean. You can easily clean your equipment with diluted (10%)hydrochloric acid that you can recuperate and recycle.
All the solutions have to be made with demineralized water.
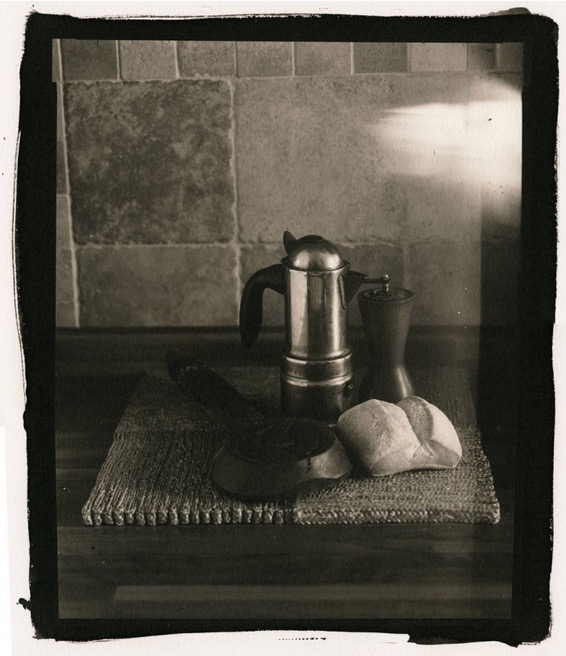
Kallitype is inexpensive and versatile. The final color might vary from a warm brown to neutral black depending on the developing agent. Also the printing toning can alter the color and intensify the depth of the blacks. A kallitype can be hard to tell from a platinum, if not impossible, even to the expert’s eye.
If properly managed, it has a good shelf life.
The chemicals used in this procedure are:
Sensitizer
Silver nitrate 10gr
Ferric oxalate 20gr
Development
Sodium Citrate 200gr
Ammonium citrate 200gr
Clearing agent
Tetrasodium EDTA 40gr
Fixing
Sodium Thiosulfate 50gr
Concentrated Ammonia 50ml
The process in brief
 On a paper support apply a sensitizer made with silver nitrate and ferric oxalate in equal parts, under a dimmed incandescent light. Once the paper is dry you can expose it to UV light, under the sun or an artificial light, through a high density negative which is placed in contact with the photosensitive surface. Proper exposition produces a “hint”of image, in which the shadows are clearly visible, that must be completed using a reducing agent which is the developer. For this reason it belongs to the DOP (develop out prints), which are prints that must be developed to complete the chemical reactions. Wash the image that you developed, and possibly but not necessarily toned, and then fix it in sodium thiosulfate (hyposulfite).
The necessary material is easy to find.
To accommodate the beginner, a kit is available. See “kit section” on our website.
It is essential to work under dimmed light. You must avoid energy saving lightbulbs and florescent lamps. These are two kinds of light that can produce UV rays It would be better to have a printing press, but anything equivalent will work.
Coat the paper with the sensitizing solution using a brush. Under UV rays, silver nitrate reacts with impurities such as dust or other materials, therefore everything must be extremely clean. Now you can go ahead with the exposure, set the negative in contact with the paper.
The paper
Properties are common to the ones of similar procedures: 100% cotton, acidic, of adequately thick and smooth texture in order to get the best details. It does not require sizing, if the paper is properly factory processed. Great texture and high quality paper are, for example, Berger Cot 320g, Crane’s Platinotype or Arches Platine. Every sheet has a front and a back. If there is filigree, the front is the side that let you see it correctly. In any case it will be the best side, easy to tell by the visual aspect and texture. N.B. You should always use the paper on the right side, but with the Arches Platine simply have to, because it is only treated on that one side.
Sensitizing reagents
You need to prepare two solutions, to be mixed right before sensitizing the paper.
Part A: silver nitrate, 10%
Add 10 grams of silver nitrate to 100 cl purified H2O. In the kit you find the ready made solution.
Part B: ferric oxalate, 20%
Add 20 grams of powdered ferric oxalate to 100ml purified H2O. In the kit you find the ready made solution.
It is fast and easy to dissolve silver nitrate in water. If stored in sealed bottles, in a fresh site with no bright lights, the silver nitrate solution has has an extended life which can last for a very long period, almost indefinitely.
Ferric oxalate solution must be kept refrigerated, away from light and in sealed containers, but even then it has an expiration date, anywhere from 6 months to a couple of years. This is why some choose to buy the powder and periodically reconstitute it, though that is not easy as it takes several hours and when you heat it the temperature must stay always under 50ºC. A light precipitate (the transparent liquid turns murky, like orgeat syrup) must be removed with simple filtering. Also the powder mixtures are not all the same, the one provided in the kit dissolves easily and is stable through time. The proportion recommended for Kallitype is lower then for Platinotype and this makes everything easier. Ferric oxalate is not toxic nor dangerous for the skin. Do not ingest.
Store the solutions separately and mix them with syringes that you will keep for this use only. Never mix the two solutions until right before using them, if you do the silver will quickly precipitate.
Ferric oxalate is exhausted when it creates “fogging” or yellowish lights (assuming that these effects have no other cause). Also if you notice some precipitation in the bottle it is a sign of the spontaneous reduction to non soluble ferrous oxalate.
Sensitizing coat
Mix in equal parts solution A and B, for a surface of 20x25cm (8×10″) consider 40-50 drops, depending on the coating method: the rod does not absorb the sensitizer the same way than the brush.
Use small and low wide-mouth glasses and, to prepare the appropriate amount of sensitizer, one glass for every sheet that you want to sensitize.
With a pencil mark the edges of the negative to enclose the area you will sensitize.
Brush method: pour the sensitizing solution over the paper and with a flat wide brush, lightly wet so that it does not absorb the whole amount of sensitizer, spread the liquid uniformly with brushstrokes in all directions. Stop when the liquid no longer accumulates.
Rod method: Get a glass or plexiglass rod, as long as the paper that you want to cover and 7-8mm diameter. Set it on one edge and with a syringe fill in the corner that forms between the rod and the paper. Then roll the rod and push the liquid along over the paper, this will immediately form a uniform coat. Roll the rod over again until the liquid is well applied. If you have a big surface it could be better to start with the rod and finish with a few delicate brushstrokes.
Drying the paper
Allow the paper to fully dry. If you place a negative on wet paper you will get a bad print, and more important you could permanently damage the negative.
You can hang it up or leave it flat; you may speed up the process by directing cold air from a hair dryer onto the back of the paper.
Exposure
You expose under UV light from the sun or UV lamps. If you work with the same source of light and with the same negative, exposure time will be alike to the Platinum/Palladium, but you still need to test it. If you use a frame where you can open the back to keep the negative registered, you can monitor the working progress. A correct exposure produces a very light image (“whisper stage of image”), if you are familiar with the platinum-palladium you will see it is similar, but it should appear slightly more intense. Platinum is referred to as a “hint” or “whisper of image”, while the kallitype is described as a “whisper stage of image”.
As a final adjustment, you can test a sample with different exposure levels and choose the correct time depending on the results. In this case remember to complete the process and also allow the paper to fully dry before you can appreciate the results.
Development
Most common developer
1) Sodium citrate 20% (sepia brune)
Sodium citrate 200gr
Purified water 1 liter
Advantages: it is easy to prepare and it gives clear highlights. You can use it to keep contrast under control if you use potassium dichromate (investigate with more specific publications). After some use (30% consumption) you will need to refill with fresh solution, not only to maintain the volume but also to avoid unwanted coloration to appear in the highlights.
2) Ammonium citrate 20% (warm reddish brown)
Ammonium citrate 200gr
Purified water 1 liter
Same developer used for platinotype. Gives high contrast and reliable results, and it is easy to prepare it.
3) Sodium citrate 20% and ammonium citrate 20%
Ammonium citrate 200 gr; distilled water 1 liter
Sodium citrate 200 gr; distilled water 1 liter
The developer is made with a combination of 500ml of each solution. This gives sepia-brown toning.
4) Sodium acetate (black-brown, neutral)
Sodium acetate 75g
Tartaric acid 3g
Purified water to make 1 liter
Dissolve sodium acetate into 750 ml warm water, add tartaric acid until fully dissolved, then enough water to make a liter. It has a soft contrast.
Procedure
The development is important when you print a kallitype, because during this process you eliminate the ferric salts which were not transformed. A development time of 5 to 10 minutes is enough to do so. The image starts showing in a few minutes. Sodium citrate combined with ammonium citrate works very well as a developer, and produces warm tones.
Use a clean tray preferably set apart for the kallitype work. Place the paper on the bottom with the front side up. Pour the developer all at once, coating the whole paper evenly as fast as possible. Let it sit for 5-10 minutes. Density has to be a little over the desired result, because it will brighten afterwords. The color will change again through the baths and the drying, gaining some density back. To be able to appreciate the result you must first complete the whole procedure.
Washing and bleaching
Demineralized water and a pinch (up to a teaspoon for 1 liter) of citric acid. 4-5 minutes.
Note: do NOT use water from the sink. It is very important the water for this wash is lightly acidic, to avoid formation of ferrous hydroxide compounds that are almost impossible to remove afterwords.
Clearing
After the development you need to wash the print. Wash twice for 2 minutes under running water while shaking the print. After each wash place it in a clearing bath 1.5% EDTA for at least 5 minutes. Finally wash the print for 2 minutes under running water before toning (if you decided to do that) or fixing.
The EDTA bath is very effective for erasing possible spots, even more than citric acid. Extend the time in the clearing bath for 10-15 minutes if necessary to get rid of possible spots.
The clearing bath slightly reduces the contrast of the print. If the spots should appear again after the fixing, you can take the print back to a new clearing bath for a longer time.
Toning
If you want to tone the image you must do it now before fixing. You can tone using different metals baths, depending on the tones that you want to obtain; you can use selenium, platinum, or gold salts. We will be more specific about this process in another section.
Fixing
Mix 50 gr sodium thiosulfate (hyposulfite) in 1 liter of water, and add a little ammonia (you can use the one you buy in houseware stores). In the kit, concentrated ammonia is provided. Use it carefully: add 5ml after you dissolve the thiosulfate, this reduces the chance of whitening that might happen in kallitype at the moment of fixing. Should this happen, increase the silver nitrate quantity. You fix the image by immersing the print, for a maximum of 2 minutes.
Final wash
Wash the print under running water for at least 30-40 minutes.
Advice for the use of silver nitrate. Silver nitrate is caustic and can cause blindness if it comes into contact with the eyes. Always use nitric gloves and safety glasses. Silver nitrate is not sensitive to light until is mixed with organic matter. If it touches the skin, even when abundantly watered down it causes brown-black spots for it colors the proteins in the deeper skin layers, and you can not wash it off. The spots will disappear only once the skin naturally regenerates. You can dissolve silver nitrate in water easily and fast. A silver nitrate solution, stored in sealed bottles, in a fresh and dark place can last for a very long time, almost endless.
Chemical products used in this procedure are to be considered toxic and non-suitable for human or animal consumption. As a user you must be aware of the risks and take care to protect the environment. Never dispose of chemical waste in a domestic sewage or with common garbage. For a correct disposal please see your local disposal laws.
Kallitype, kallitype, kallitype for beginners, kallitype print
Ziatype beginners kit
Ziatype Ziatype Beginner kit (Kit09) Kit contents Sensitizing: Ammonium Ferric Oxalate sol.A 25ml Ammonium Ferric Oxalate contrast sol.B

Wet plate Collodion-formulating Poe Boy
Collodion process-Poe Boy formula (No ether/No cadmium) The procedure for the collodion “poe boy”, or “poor boy” as some say, is interesting for it does

Wet plate Collodion-Old Work-Horse process
Old Work-Horse for positive process 1°- Collodion solution (part A) pour 220 ml plain collodion into a 500 ml beaker slowly, add 140 ml ether


